7c Shell Renovation
What’s to do
The first task I’m going to do is to get the shell to a new baseline. Not to be overly critical, but any kit instrument is built to a price and to a schedule, and this means there are going to be some compromises made due to economic considerations. This is especially true when you encounter an instrument whose construction can not be easily automated, like a lute.
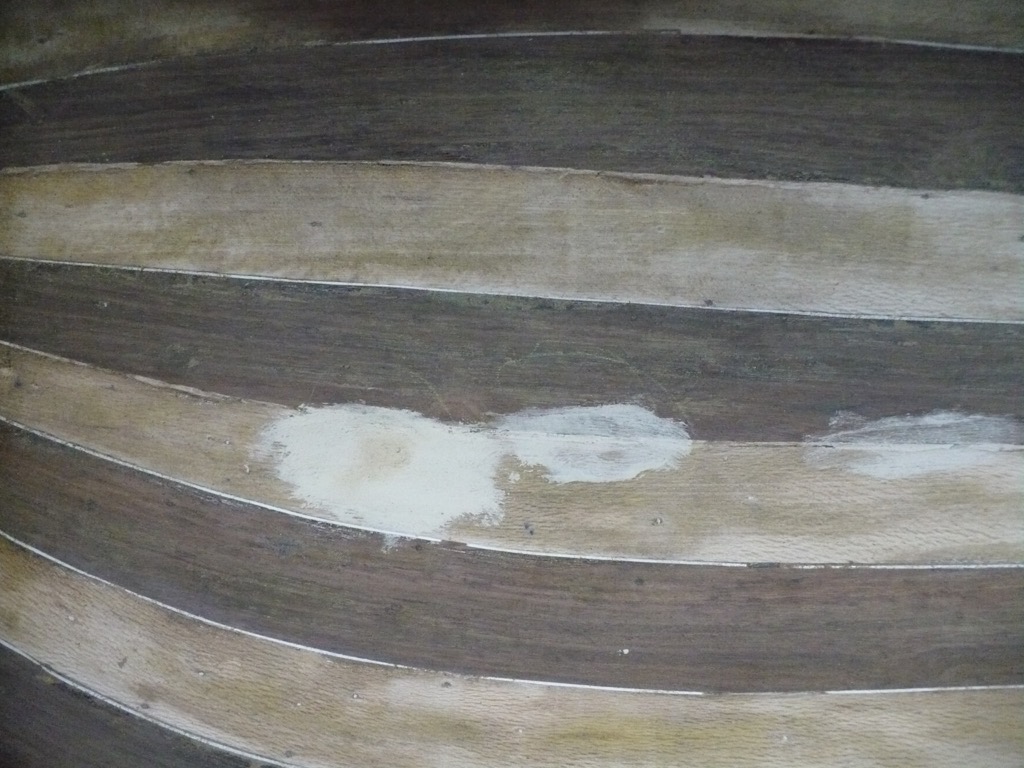
Here’s the shell as I have it:
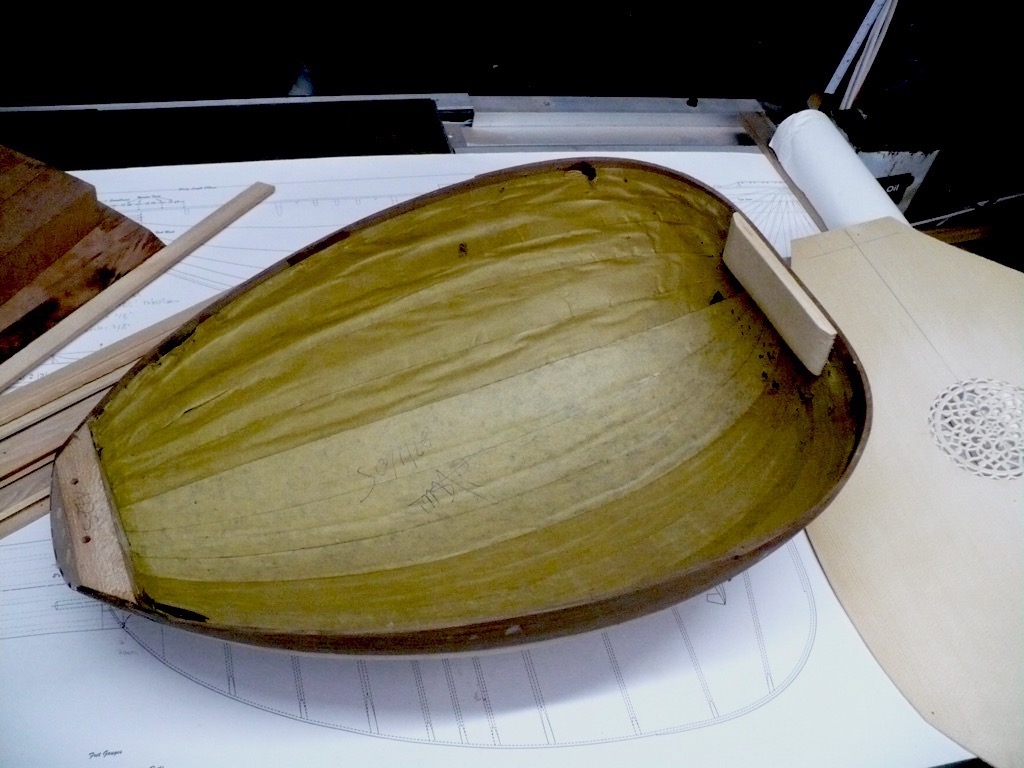
There are a couple of obvious issues here:
-
The paper is heavy and might be hiding some nastiness. It has to go.
-
That block of wood at the base of the lute – the counter cap – is too big and too ugly however, in this case, I don’t think it is worth my while to “fix” it. Or, rather, I suspect any attempt to fix it would cause me more problems than leaving it in place.
So taking off the paper it is!
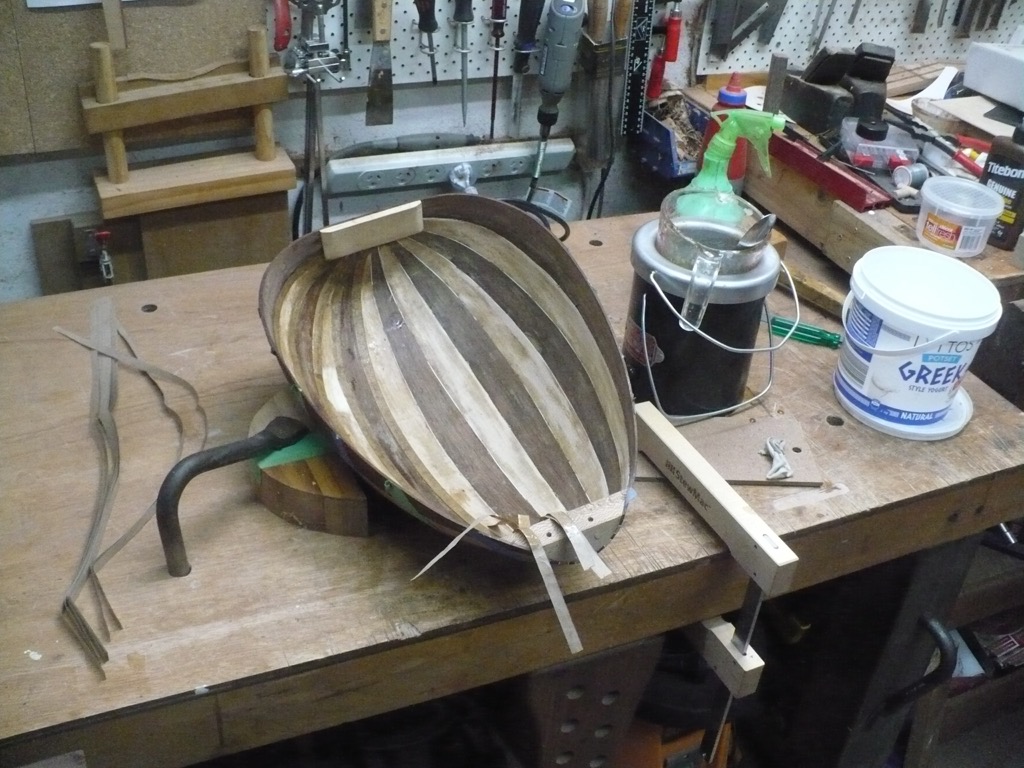
But first, let’s add some painter’s tape to the outside of the shell to help with the rigidity. Even a small amount provides good support.
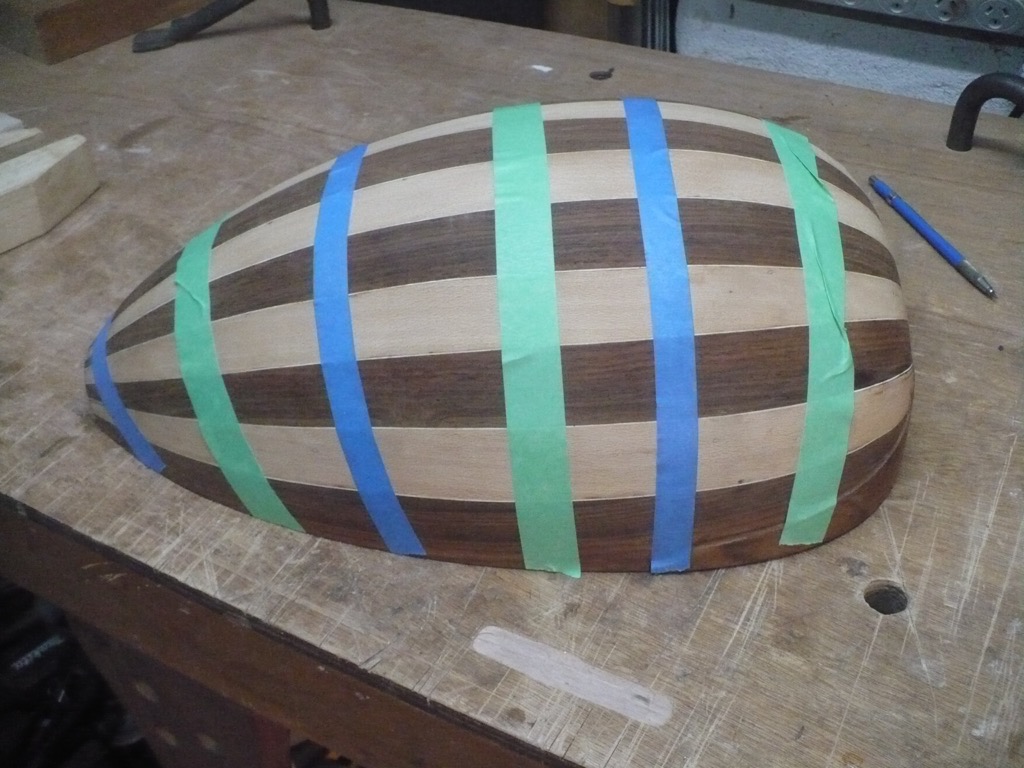
This will stay on until it is time to take it off…
Removing the paper
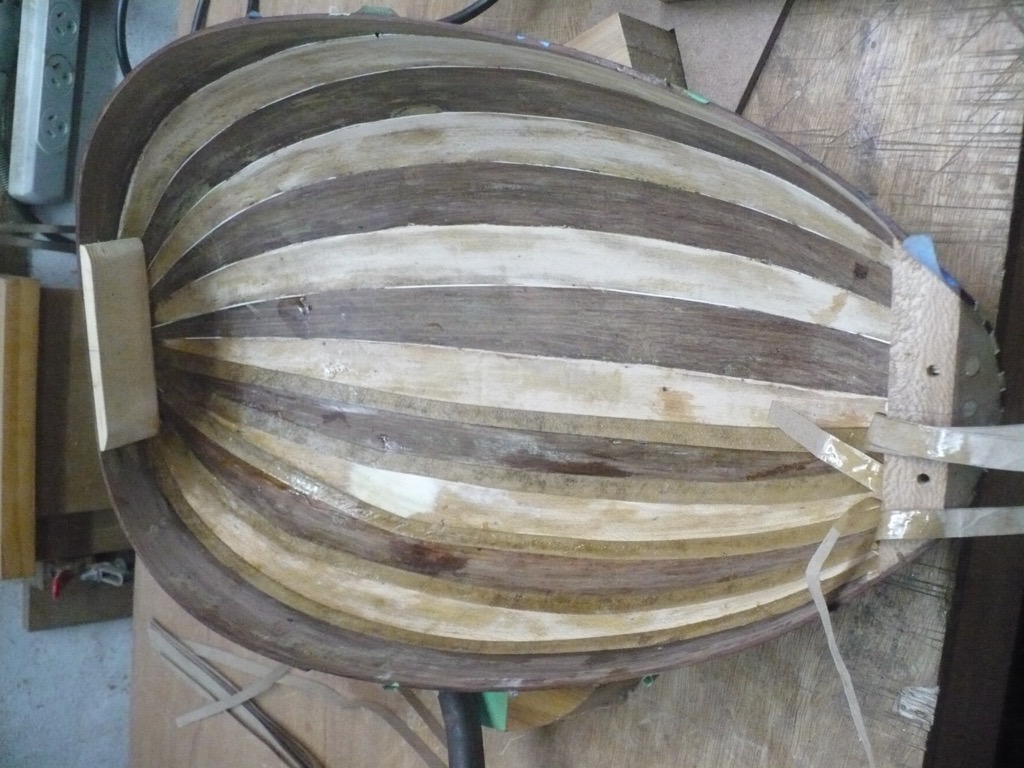
Let me show you what I’m dealing with here:
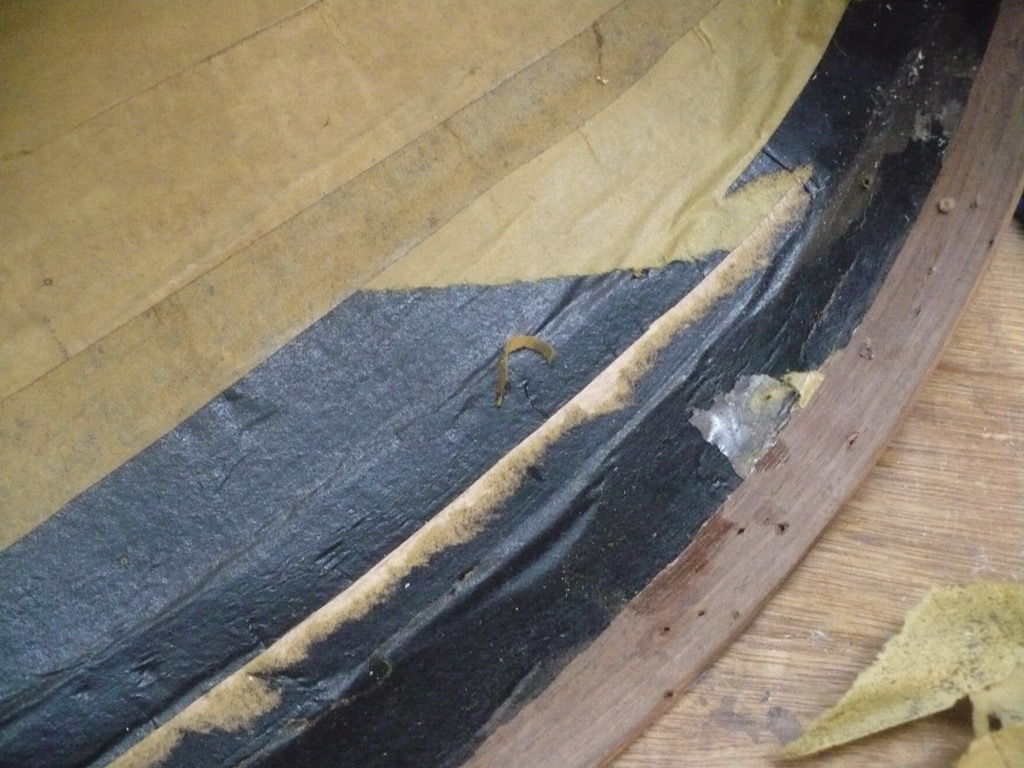
Underneath the yellow paper, the shell has been lined with black paper. Both of these have been hurriedly glued down (see the bubbles?). It’s got to go! Easily said…
This job isn’t that hard, simply time consuming with an eye to care (the shell is thin and too much pressure can break the wood). Out come my curved cabinet scrapers, a spritz bottle with tap water, and on goes some long-winded TV soaps. A couple of days later and I get to this:
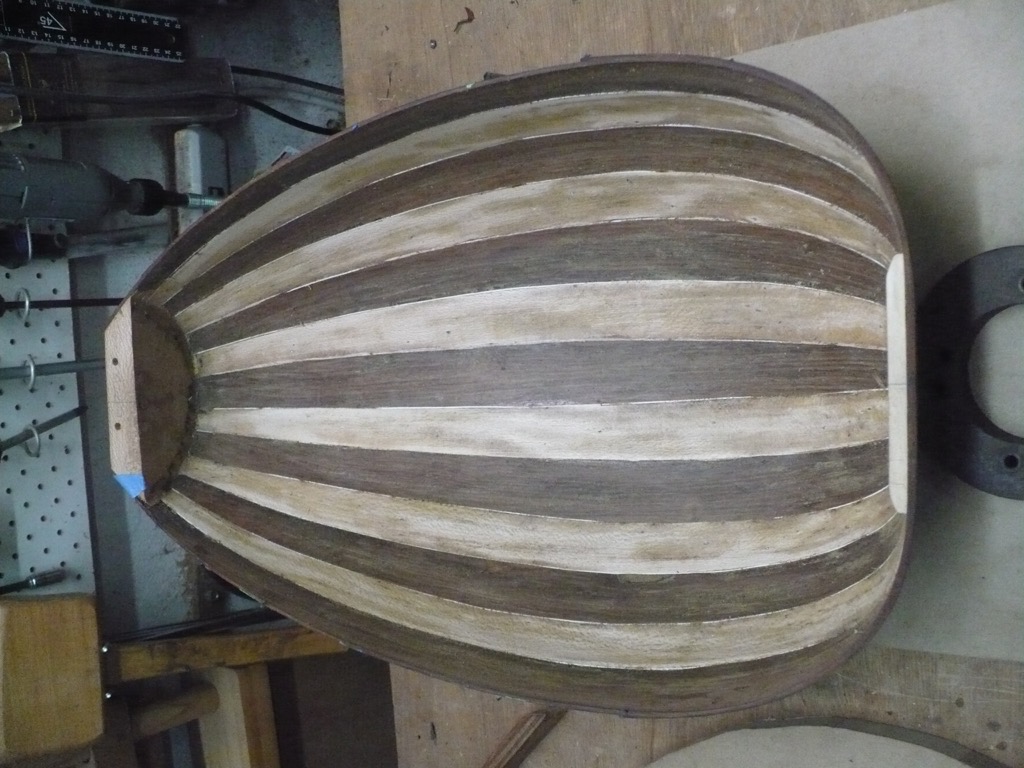
Now we are cooking with gas!
Thinning
I spent some more time with the scrapers and sandpaper evening out the stave, reducing the rough spots, and overall cleaning it up. Simple stuff, again requiring care.
The next step was to hold the shell up to a bright backlight and check for holes and thin spots. Somewhat unsurprisingly there were a few (around a tearout in one of the papered-over staves). This is a pretty easy fix with a neutral filler.
That done, it is now time to put some paper back on.
Papering
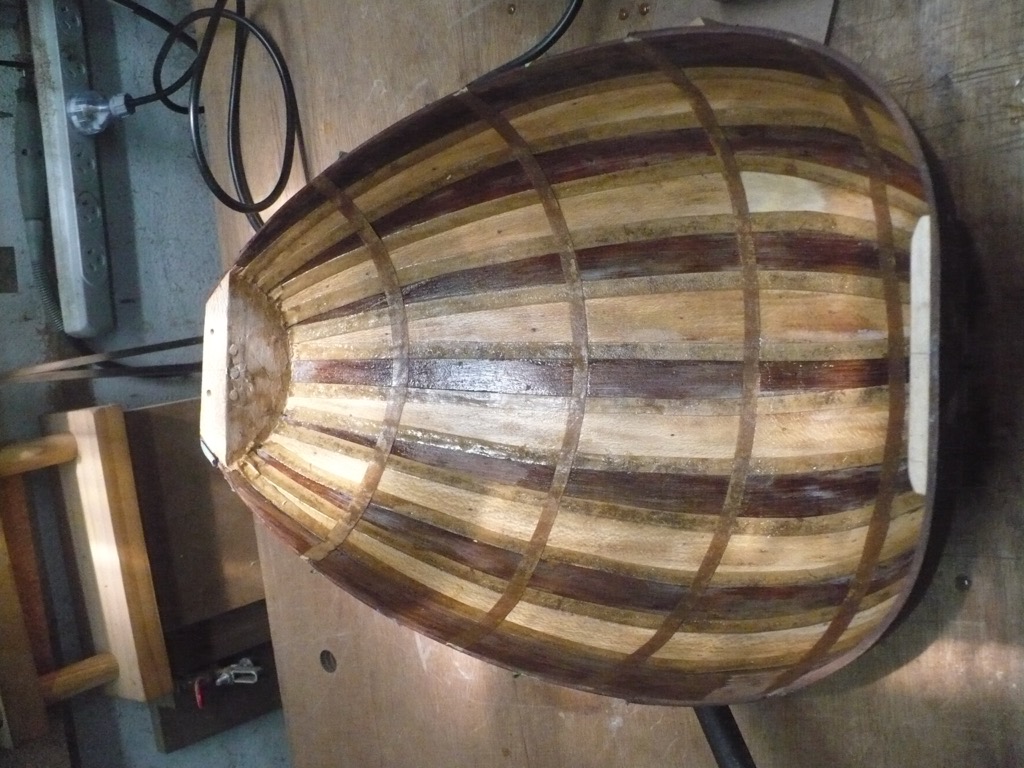
The paper we removed serves a structural purpose – those edge joints really like some help! – so it has to go back. Though in a much more targeted manner.
I was warned by Travis (you can see how a master does this job here) that this is a messy job. He’s not wrong! The basic idea is you soak a strip of paper in hot hide glue then apply it to the lute, covering the seam between the staves. I’m pretty lucky I only have 12 seams and 5 cross pieces to do!
Here’s my setup:
Details: The glue is in the pyrex pot inside the actual glue pot (neater this way); The spoon is used to press the paper into the glue; The yogurt bucket has water, an absolute must because you are going to get sticky!; There is a small piece of rag used to squeegee down the strips; and the strips themselves are on the left (reclaimed from an old StewMac order, seemed appropriate).
The procedure: Wearing nitrile gloves, pickup a strip, run it through the liquid hot hide glue, run it between fingers to squeeze off excess, apply carefully to lute pressing into joint with a finger, run slightly damp cloth over the placed strip to remove excess glue. Repeat.
Here is detail of the in-process papering:
The final step, once all the strips are in place, is to remove any glue lumps and even it all out. I did this by diluting the remaining glue a little and taking first a paintbrush dipped in the mix, then a wetted rag, to the inside. This is one way of sealing the insides. This is it all done (though still wet)
Some notes:
-
I used 30g of raw glue (pearl form) in 45g of water. The ratio wasn’t too bad but I barely had enough to do the job. Were I to repeat this I’d probably go to 50g glue (75g water).
-
Cut the strips longer than you need and trim them later. Having one end not lathered in glue is helpful in placing the strips accurately.
-
Gloves and water are necessary, not optional. This is sticky-messy!
-
Quite fun, though.
Next time
Belly scoop and starting to look at the neck…
Thanks for reading!